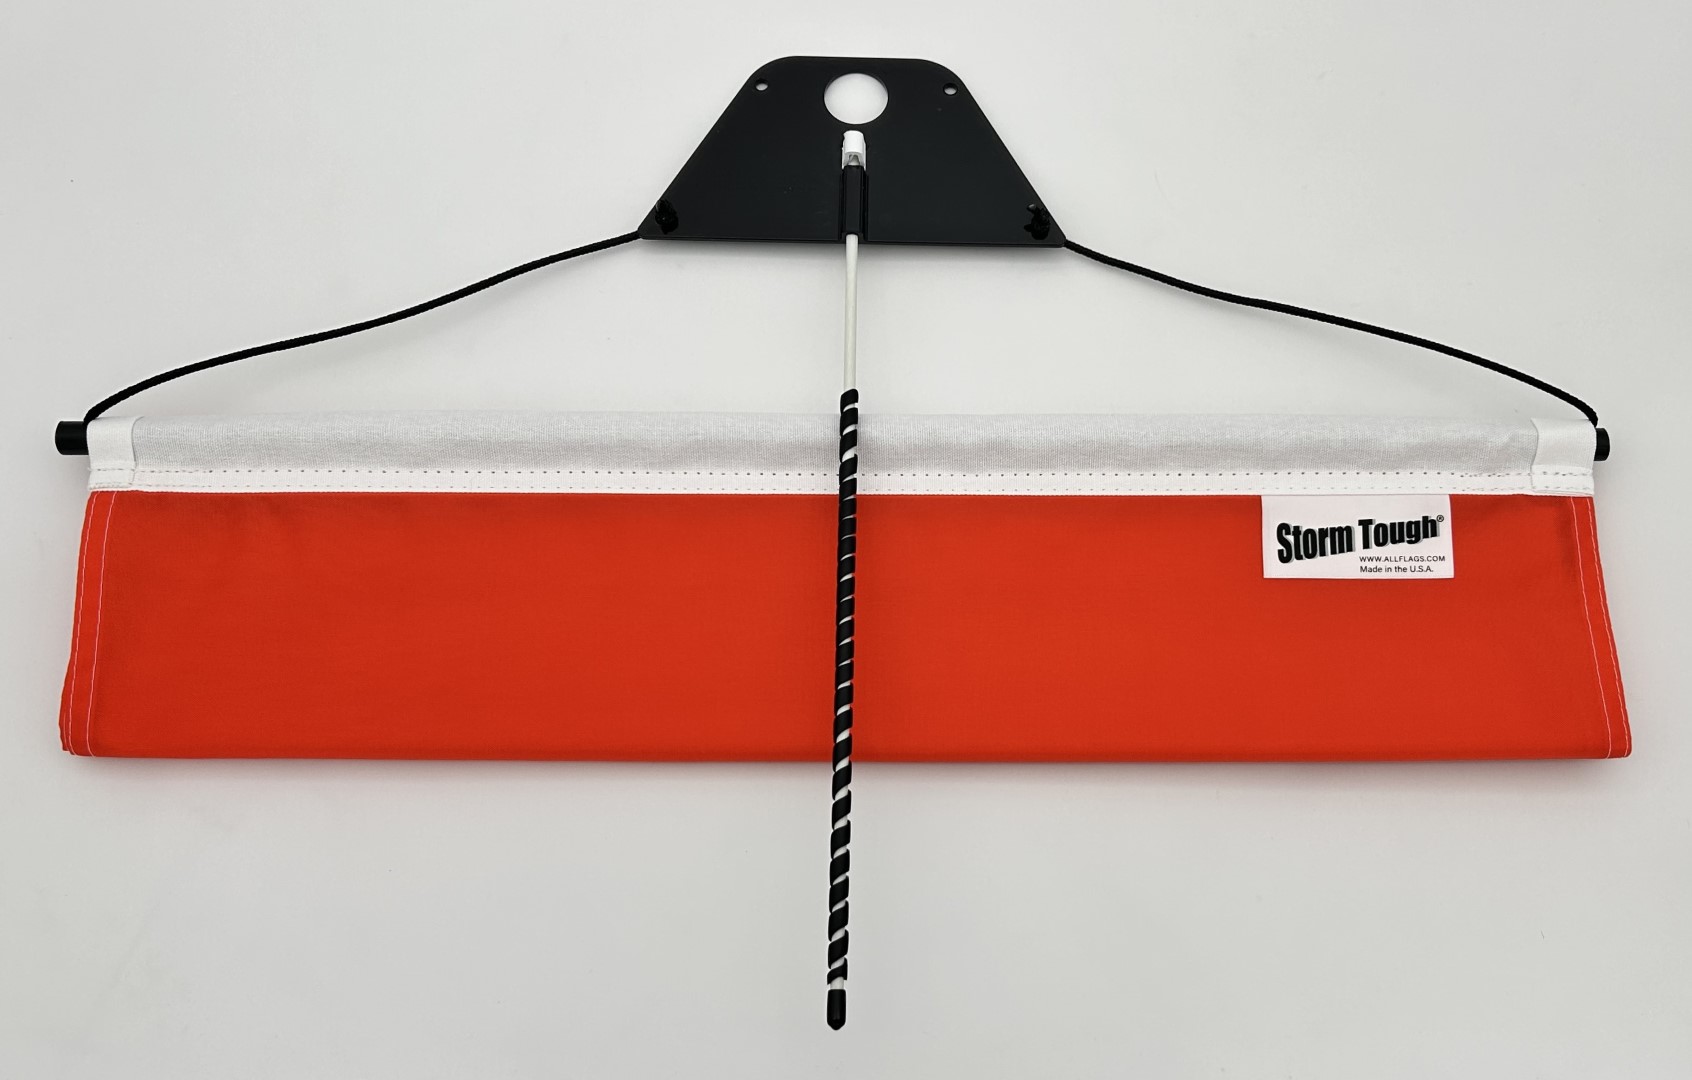
Wind Tracker 6000 Series – Replacement Windsocks
INSTALLATION INSTRUCTIONS
For Products:
Wind Tracker™ Replacement Windsocks 6000 Series
PLEASE READ!
The Wind Tracker™ System should be installed within the routes of evacuation and at a height not to exceed 20 – 25
feet above grade for proper performance, safety, and accuracy.
Installing the Wind Tracker™ Windsock System at high elevations where unobstructed wind conditions prevail will
not demonstrate the actual wind movements in, and around, the area of evacuation, and may lead to persons
exiting the site or area in the wrong direction.
Every Wind Tracker™ replacement kit includes (1) windsock, (2) pocket wind charts, (2) hardness cords,
(2) flip over clips (one is spare), and instructions. This replacement kit is compatible with all Wind Tracker products.
Three Easy Installation Steps – No tools required:
Step One:


Remove the harness cords and slide the worn Wind Tracker™ Windsock off the Lexan crossbar. When replacing the
harness cords, thread them into the holes at each end of the existing crossbar. Tie a simple overhand knot at the
end of the cord protruding from the crossbar. Tighten the knot and pull it into the crossbar. Tie the knot as close to
the end of the cord as possible (see illustration above).
Step Two:


Slide the crossbar with cords into one end of the Wind Tracker™ hem and through until it protrudes out of the other
end. Tie the cords to the pivotal harness plate using a simple overhand knot. Tie the knot as close to the end of the cord as
possible (see illustration above).

Step Three:
Insert the 14” fiberglass “Flip-Over” rod into the channel on the pivotal harness plate and secure with the small white clip. Be sure the flip-over rod is positioned on top of the Wind Tracker™ Windsock.
Finale assembly should resemble photo (right) and your replacement windsock is now ready to reinstall unto the Directional Vane™ and Wonder Pole ®.
END